
APISIX's support for stream routes and, in extension, the MQTT protocol is often overlooked. Let's change this by looking at an end-to-end example of how APISIX can act as an MQTT proxy.
People typically use the MQTT protocol when transferring data from IoT devices because of its low overhead and ease of implementation.
MQTT was created for sending small chunks of data over unreliable networks and uses a binary format rather than the typical text-based format used in protocols like HTTP or SMTP. With client libraries in multiple programming languages, you are unlikely to have to implement the protocol on your own but use an existing library.
As your IoT devices move to the cloud, you face a different challenge of managing multiple protocols seamlessly. Questions arise like "How can I use a single entry point for all my traffic?", "How do I decouple my IoT and cloud infrastructure with little overhead?", and "How can I do all this securely?"
This article attempts to answer these questions using Apache APISIX, which supports HTTP and MQTT protocols, to proxy requests between your devices, message brokers, and the cloud.
Why an MQTT Proxy?
APISIX is primarily used as an API gateway for routing HTTP traffic.
As an IoT developer recently pointed out, APISIX's support for stream routes and, in extension, the MQTT protocol is often overlooked. Let's change this by looking at an end-to-end example of how APISIX can act as an MQTT proxy.
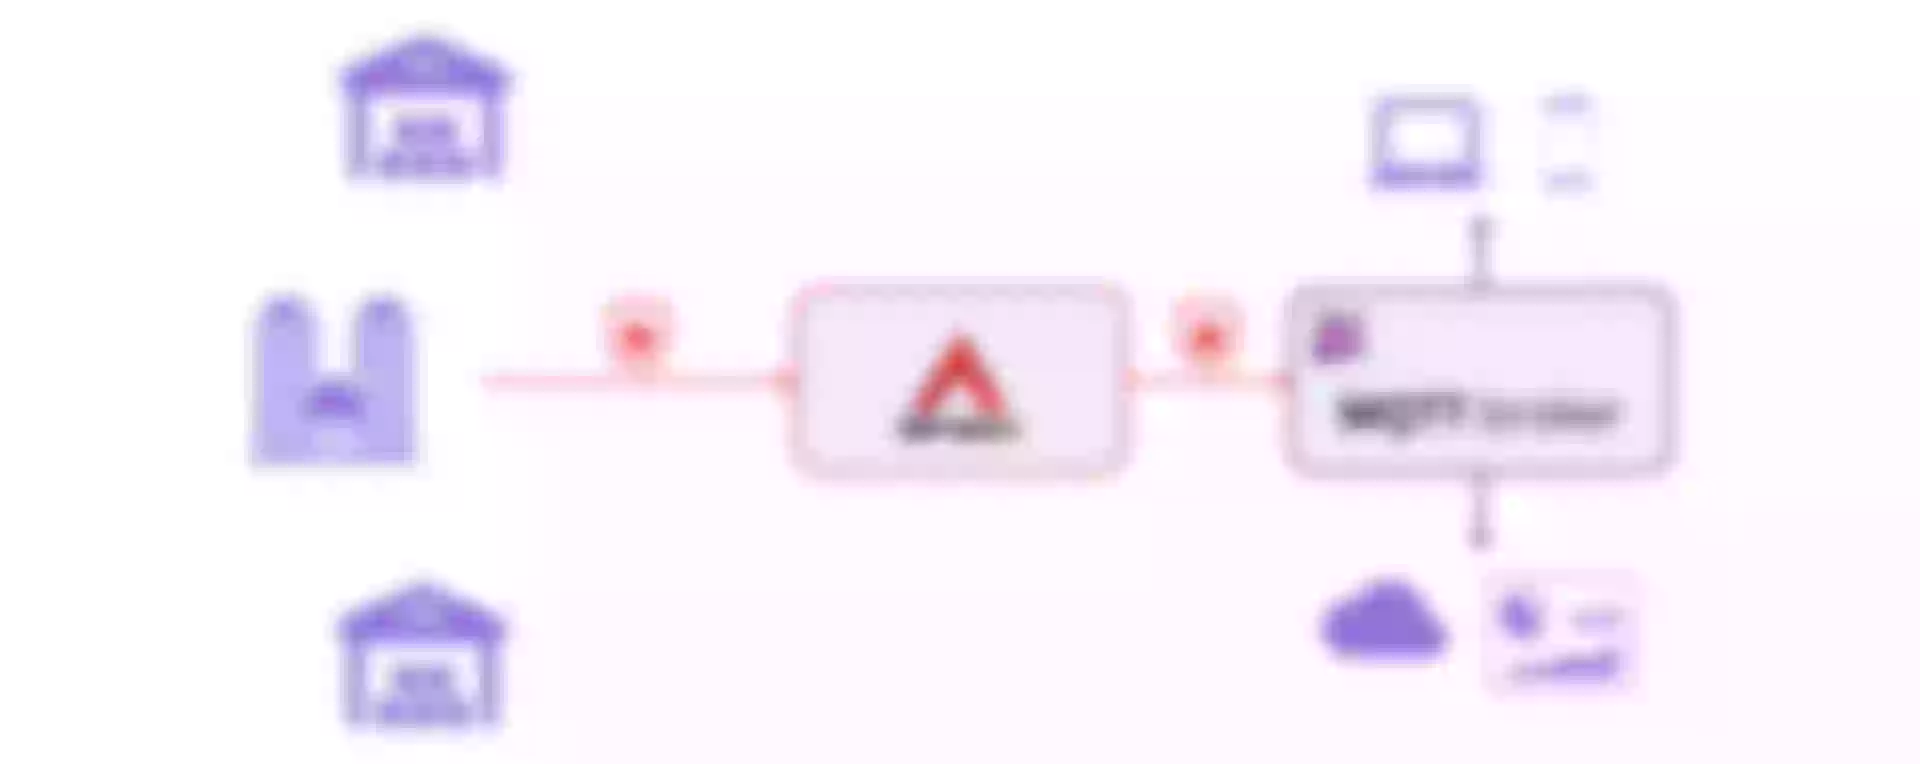
In this example, you own two warehouses and an office. Data from your warehouses and the office are sent to the storage, monitoring, and analytics services deployed in your cloud through APISIX over HTTP. We will refer to this as "the system."
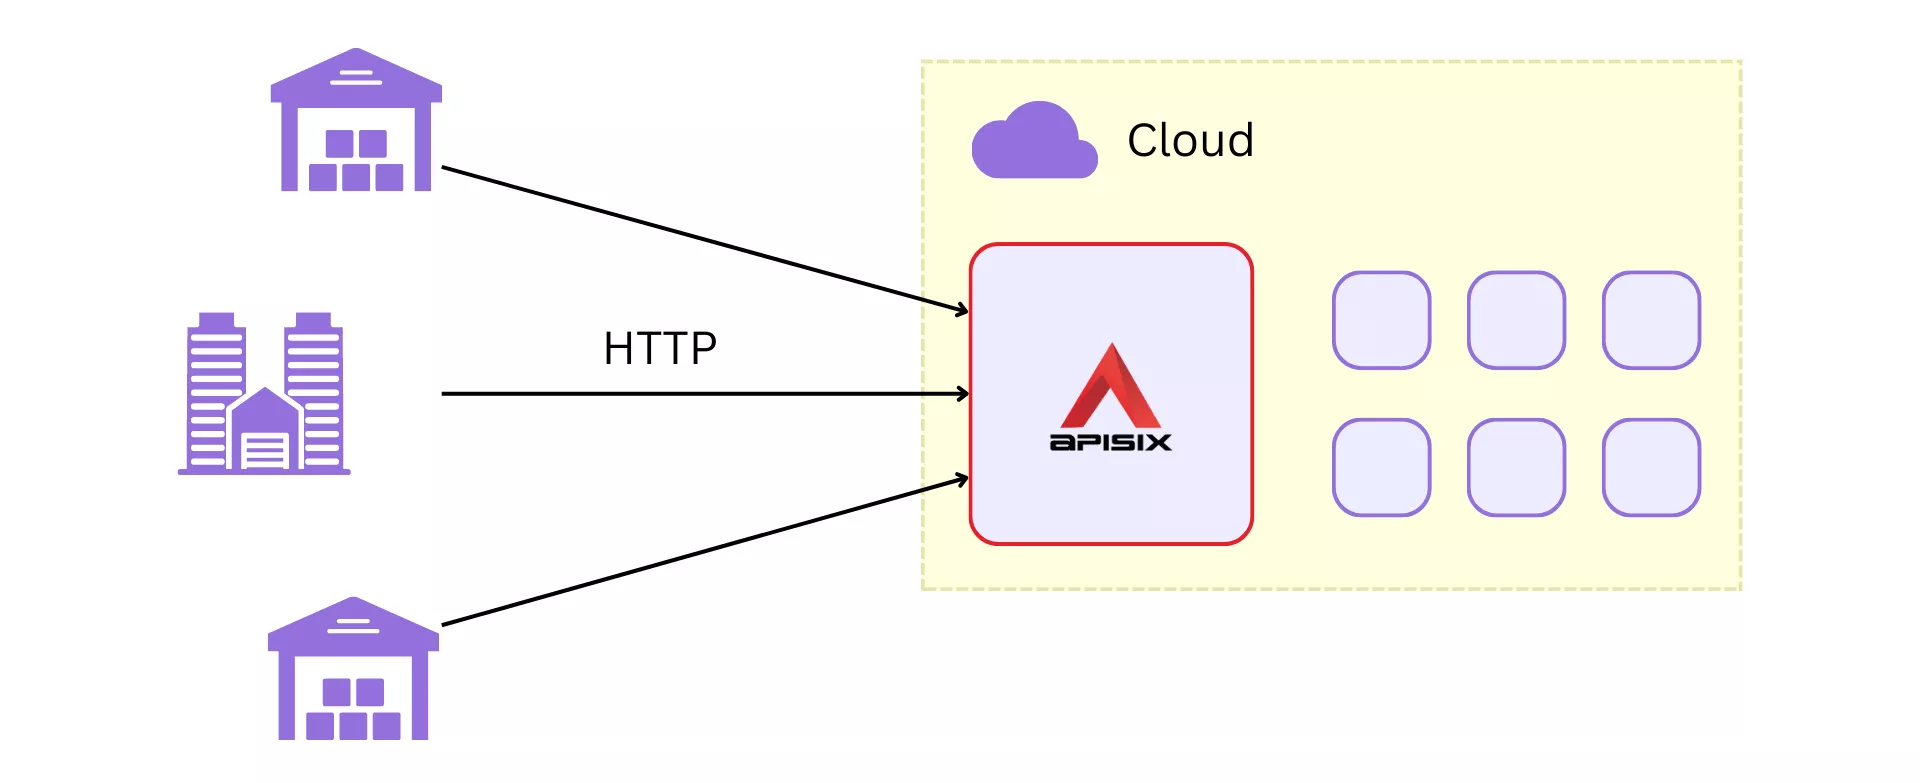
Apache APISIX will route all requests from your warehouses and office to appropriate services in your cloud backend.
You now decide to add two IoT devices to improve the efficiency of the system:
- A flow meter to measure the flow rate of water in your warehouses.
- A light sensor to measure the illuminance in your office and warehouses.
These devices are small, energy-efficient, and support the MQTT protocol. The measurements from the flow meter are used by an automatic valve to control the water flow rate, and the light sensor is used to maintain optimal lighting.
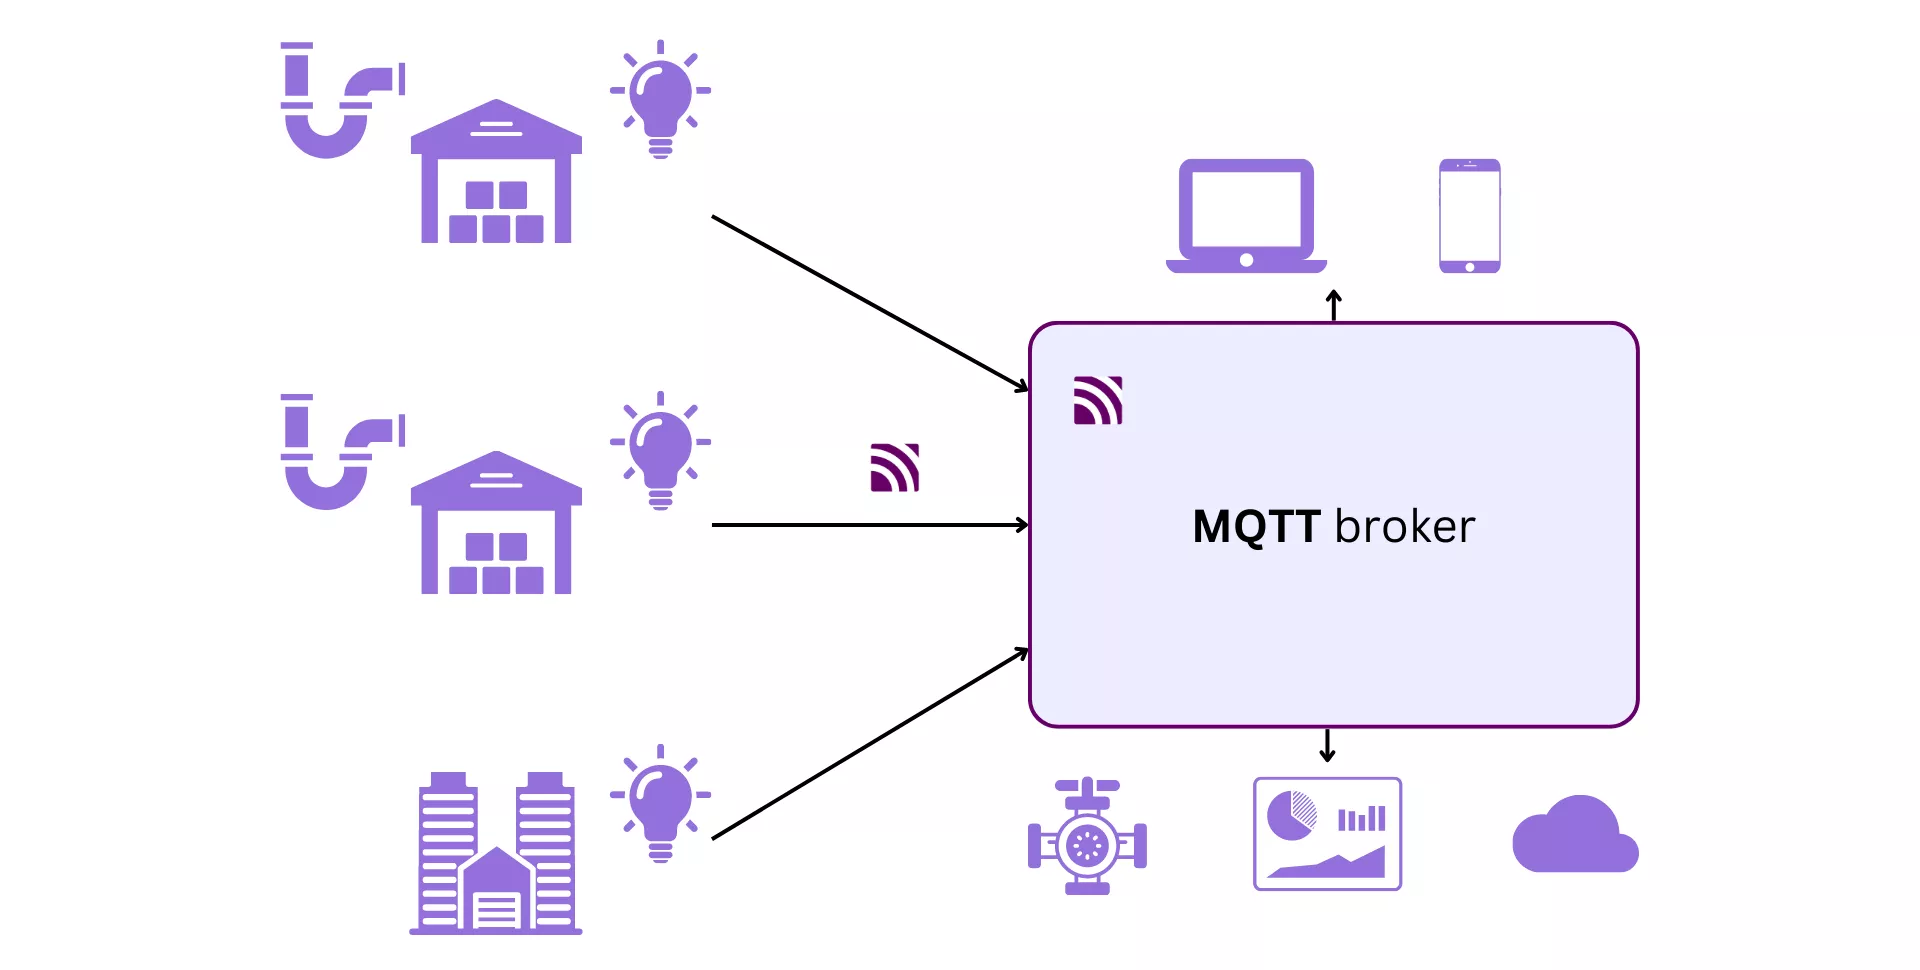
Here, the devices will send messages directly to your MQTT broker. Multiple clients including phones, PCs, valves, and your cloud services are subscribed to the broker.
As shown above, you can deploy this system independently from your cloud infrastructure. But the toll of maintaining separate infrastructures for your IoT devices and cloud can also be pretty high both in terms of cost and effort.
However, combining the two systems is not a trivial task. You must work with multiple protocols but use a single entry point to reduce infrastructure costs and maintenance overhead. This is where being pragmatic and using APISIX pays you off.
A Unified Entry Point
Apache APISIX supports MQTT and HTTP protocols and can work as a proxy between your IoT devices and the cloud. APISIX supports this through the mqtt-proxy plugin, which allows it to load balance and route MQTT messages between brokers.
With the APISIX MQTT proxy, your system can look something like this:
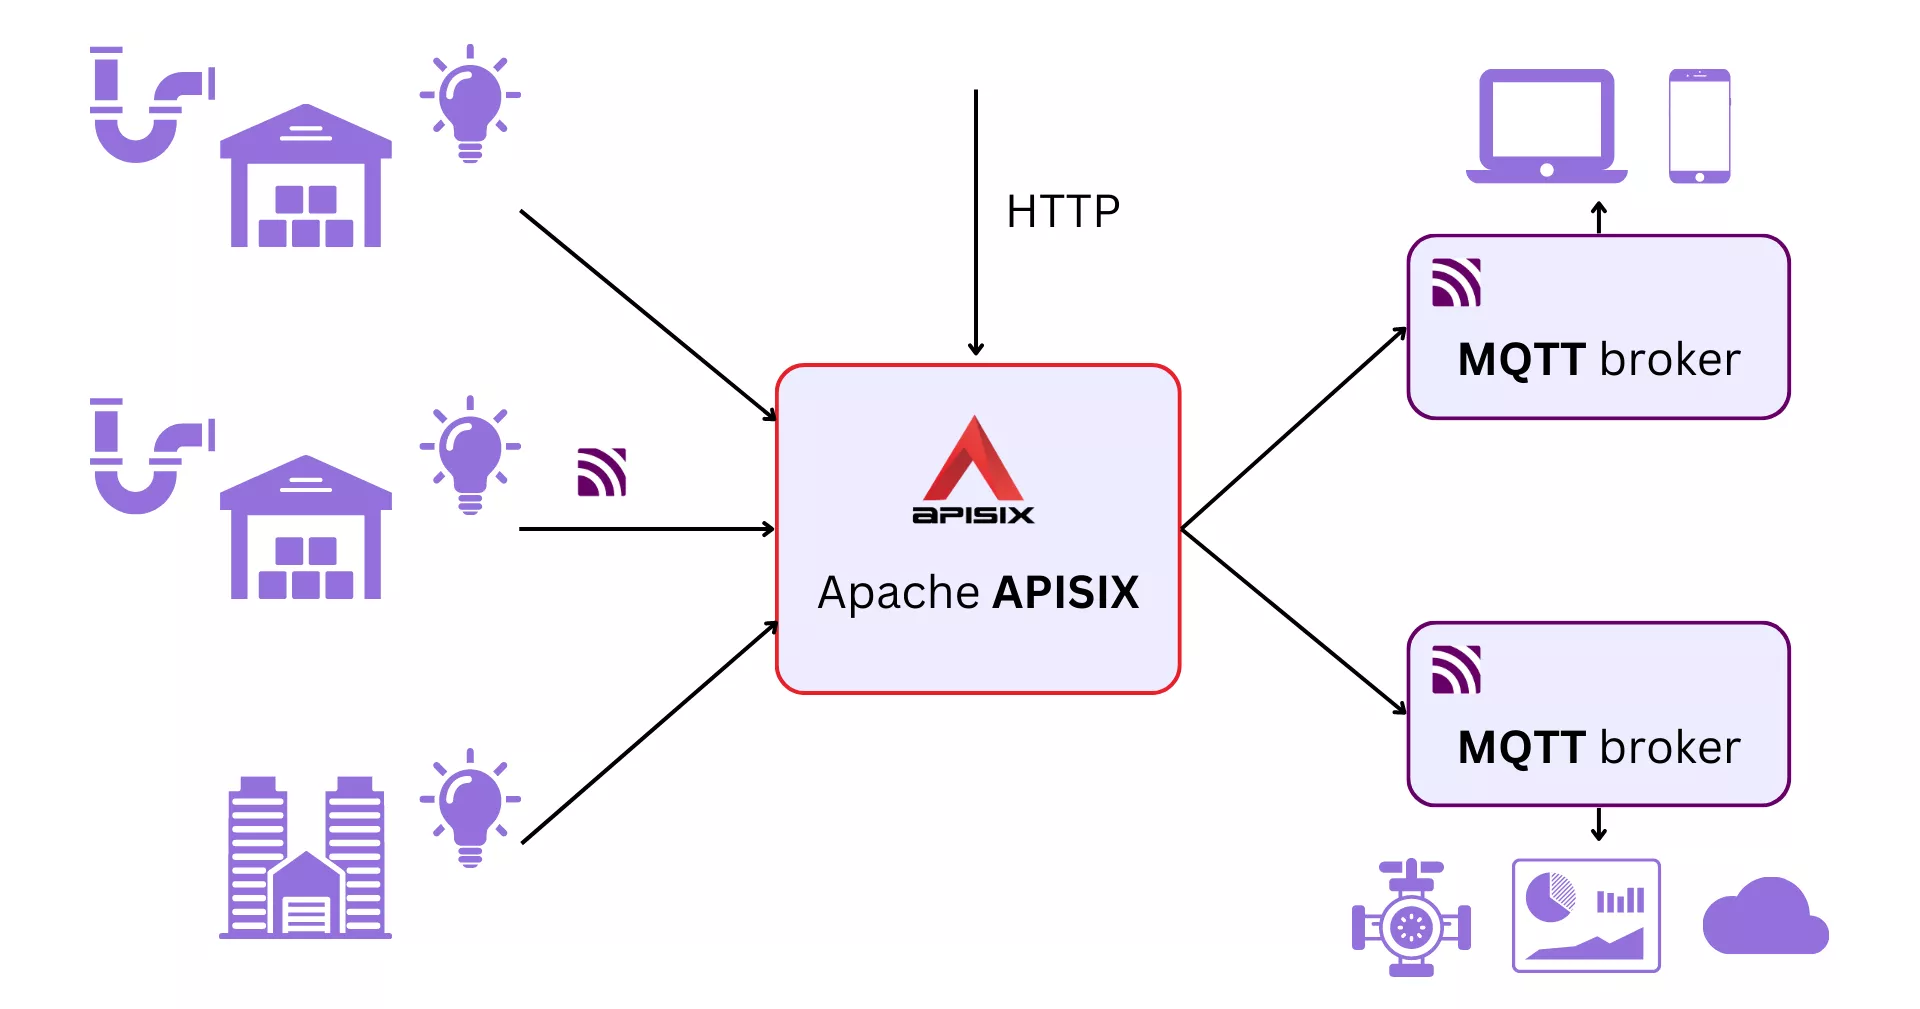
Now in addition to your HTTP traffic, APISIX also manages your MQTT traffic and can route it between your message brokers.
APISIX will do all the heavy lifting and process both HTTP and MQTT requests, removing any additional overhead from your cloud or IoT devices.
Routing MQTT messages is useful when you want to use multiple brokers. The mqtt-proxy plugin routes the messages based on its clientId using a consistent hashing algorithm. This allows you to send messages from different clients to different brokers dynamically. For example, you can send messages from the flow meters and light sensors to different brokers.
In practice, you can configure this in the mqtt-proxy plugin. The example below shows the configuration in standalone mode:
apisix:
  enable_admin: false
  stream_proxy:
    only: false # allow HTTP as well
    tcp:
      - addr: 9000
        tls: false
deployment:
  role: data_plane # deploy APISIX in standalone mode as a data plane
  role_data_plane:
    config_provider: yaml
stream_plugins:
  - mqtt-proxy # enable the mqtt-proxy plugin
#END
stream_routes:
  - id: 1
    upstream_id: 1
    plugins:
      mqtt-proxy:
        protocol_name: "MQTT"
        protocol_level: 5 # use MQTT 5.0
upstreams:
  # configure multiple brokers
  - nodes:
      "host.docker.internal:1883": 1
      "host.docker.internal:1884": 1
    type: chash
    key: mqtt_client_id
    id: 1
#END
You can also use the Admin API to configure this on the fly:
curl http://127.0.0.1:9180/apisix/admin/stream_routes/1 -H 'X-API-KEY: edd1c9f034335f136f87ad84b625c8f1' -X PUT -d '
{
    "plugins": {
        "mqtt-proxy": {
            "protocol_name": "MQTT",
            "protocol_level": 5
        }
    },
    "upstream": {
        "type": "chash",
        "key": "mqtt_client_id",
        "nodes": [
        {
            "host": "host.docker.internal",
            "port": 1883,
            "weight": 1
        },
        {
            "host": "host.docker.internal",
            "port": 1884,
            "weight": 1
        }
        ]
    }
}'
Decoupling from the Cloud
Using multiple message brokers is a straightforward way to separate the cloud from your IoT devices while keeping them connected.
In our example, you can deploy a broker locally with the IoT devices and use a different broker for the cloud. APISIX will be able to route traffic between the two as shown below:
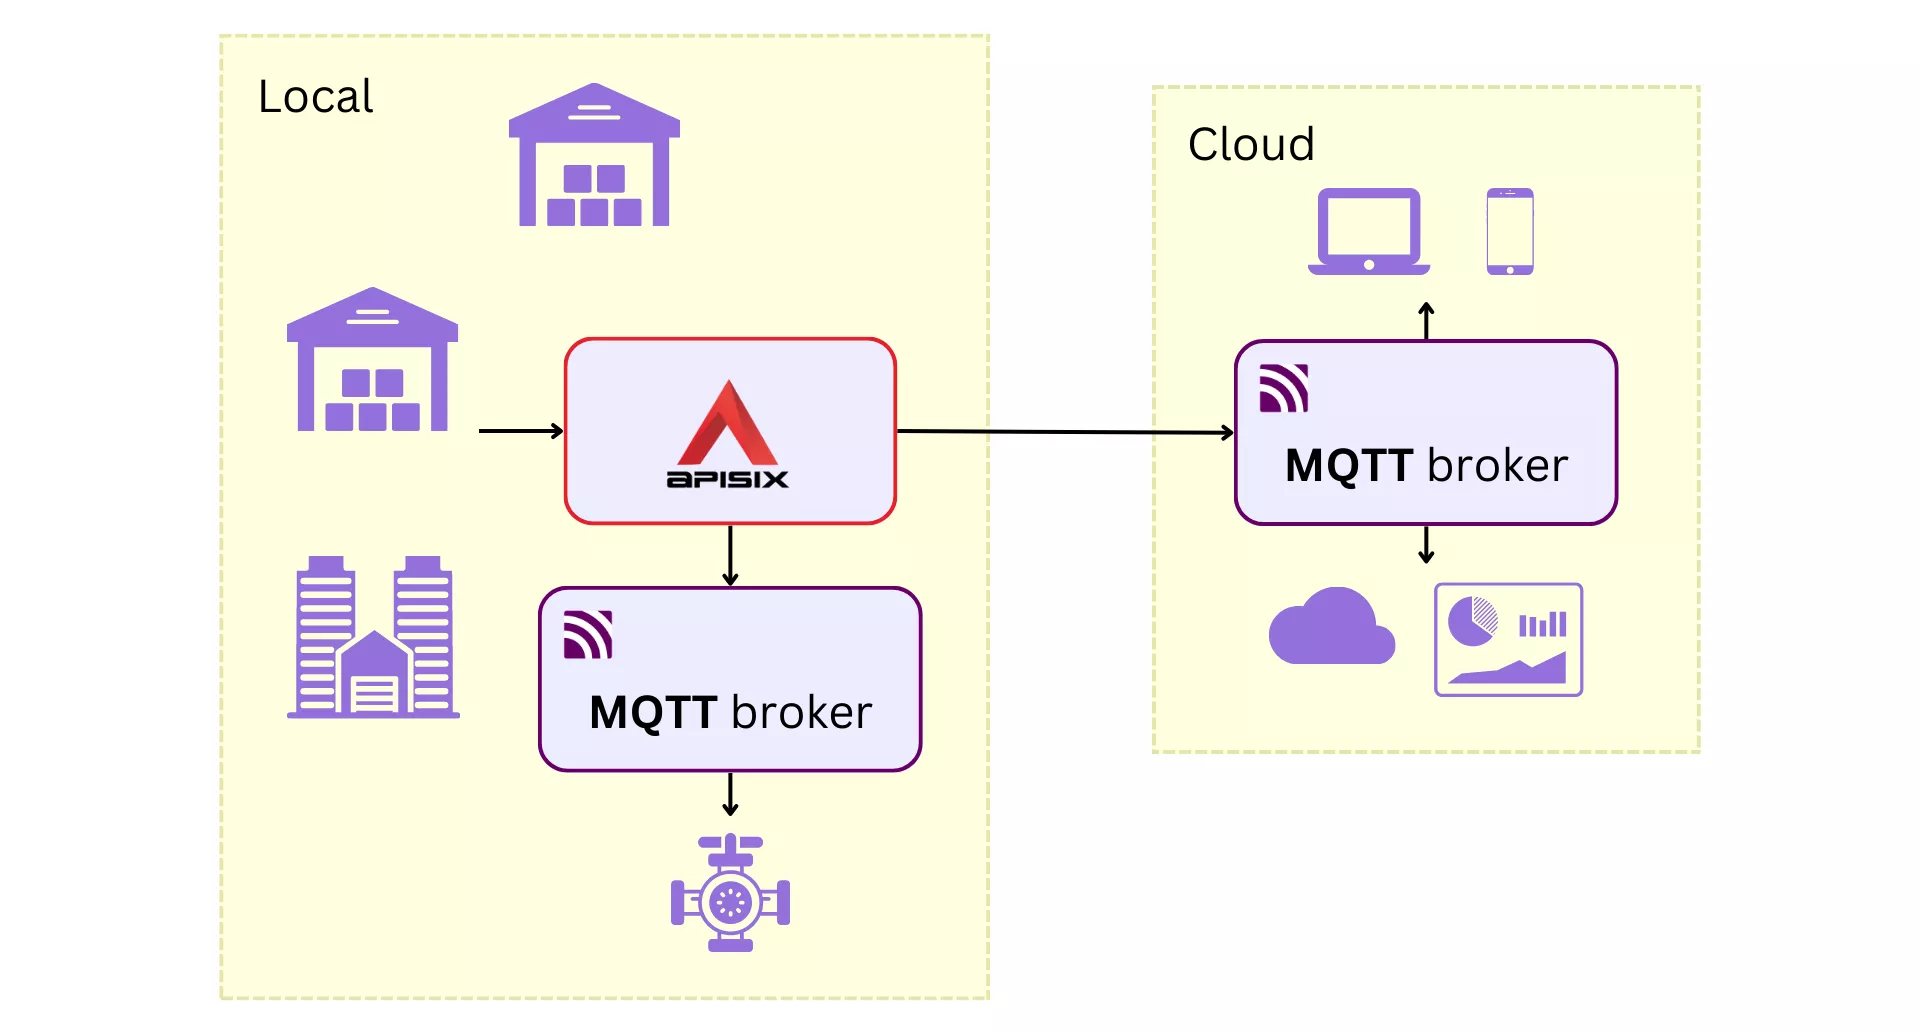

The broker in the local network will communicate with the valve and rest of the clients in the local network. APISIX will route the required messages to the broker deployed in your cloud which different clients in the cloud can subscribe to.
Decoupling has its benefits. Now APISIX can handle the communication with the cloud, and your devices can communicate with APISIX instead of directly with the cloud.
TLS All the Way!
Another critical requirement for any communication system is security.
With APISIX as the MQTT proxy, security would mean securing the IoT device-to-APISIX and APISIX-to-cloud channels. The diagram below illustrates how APISIX achieves this through TLS authentication:
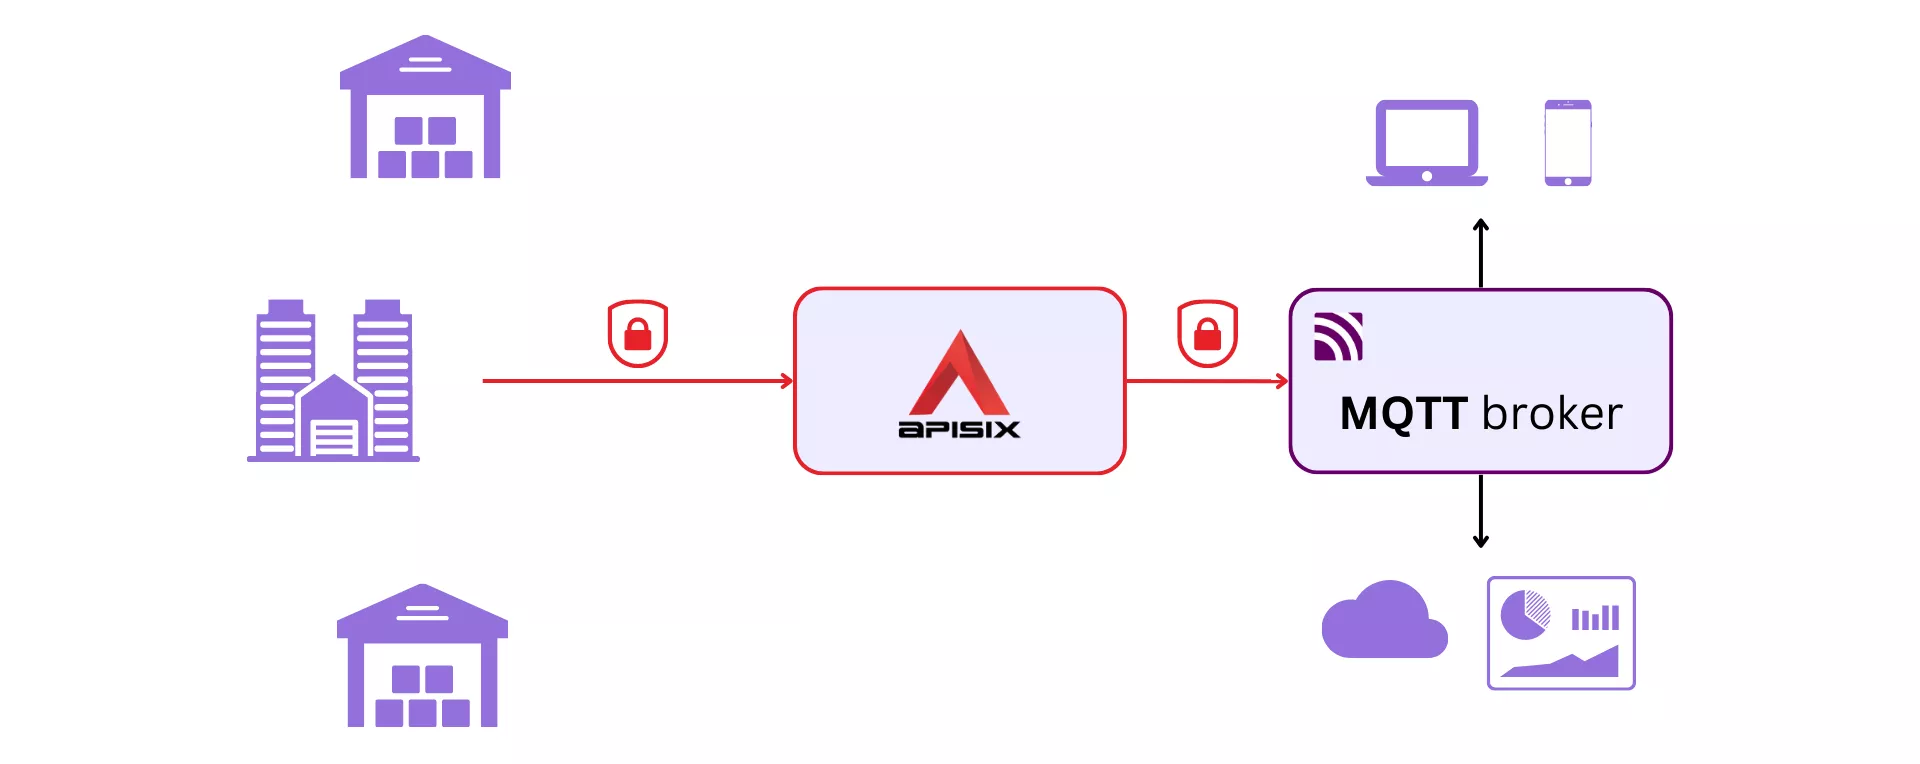
APISIX can secure the client-to-APISIX and APISIX-to-broker communication.
In practice, we can update our configuration files to enable mutual TLS for the route (IoT-to-APISIX) and the upstream (APISIX-to-cloud):
apisix:
  enable_admin: false
  stream_proxy:
    only: false # allow HTTP as well
    tcp:
      - addr: 9000
        tls: true # enable TLS authentication
deployment:
  role: data_plane # deploy APISIX in standalone mode as a data plane
  role_data_plane:
    config_provider: yaml
stream_plugins:
  - mqtt-proxy # enable the mqtt-proxy plugin
#END
stream_routes:
  - id: 1
    upstream_id: 1
    sni: mqtt.navendu.me
    plugins:
      mqtt-proxy:
        protocol_name: "MQTT"
        protocol_level: 5 # use MQTT 5.0
upstreams:
  # configure multiple brokers
  - nodes:
      "host.docker.internal:1883": 1
      "host.docker.internal:1884": 1
    scheme: tls # enable TLS on upstream
    type: chash
    key: mqtt_client_id
    id: 1
#END
For a complete guide on configuring TLS, refer to the documentation.
Improving the MQTT Proxy
One of the key features of Apache APISIX is that it is entirely open source and extensible. You can add more features like MQTT transcoding to the MQTT plugin or create new plugins for your specific MQTT proxy.
We are seeing more users using APISIX for its MQTT support, which is bound to increase further as MQTT becomes the default protocol for communication between IoT devices.
A special thank you to Alfonso González for his input and review. Alfonso and his team use APISIX's MQTT proxy features in production.